Getting an ssl certificado gratis is straightforward: use Certbot on a Linux server, Cloudflare's proxy, or a one-click installer in cPanel or Plesk. Let's Encrypt certificates are valid for 90 days and renew automatically, so you never need to replace them by hand. The whole process takes under 15 minutes on a standard Ubuntu or Debian server.
This guide walks you through choosing the right method for your setup and verifying that your certificate is working. The Certbot section uses numbered steps; the Cloudflare and control panel options are shorter paths that need less configuration.
What Is an SSL Certificate and Why Does Your Site Need One?
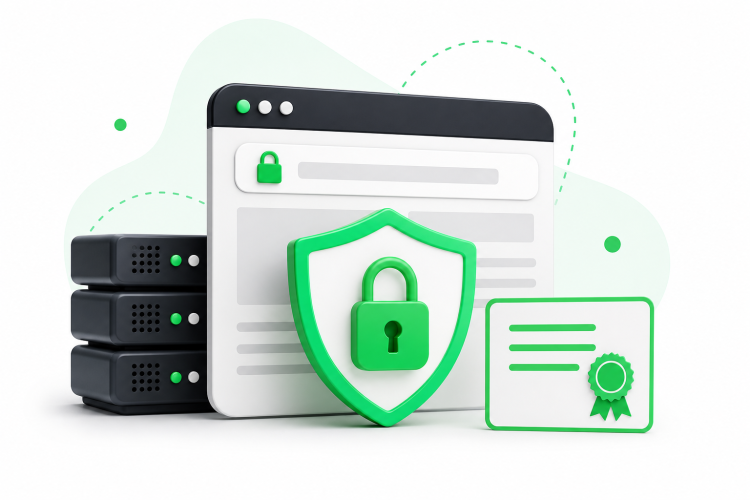
SSL (Secure Sockets Layer, now technically TLS) encrypts the connection between a visitor's browser and your web server. When a certificate is installed and valid, browsers show a padlock icon in the address bar and load your site over HTTPS instead of HTTP.
Why does that matter? Three reasons: security, trust, and search rankings.
Security first. Without SSL, data sent between your visitor and your server travels in plain text. Login credentials, contact form entries, payment details, all readable by anyone intercepting the connection. An SSL certificate encrypts that data end to end.
Trust next. According to a GlobalSign survey, 82% of users will abandon a purchase if they perceive the website is not secure. That padlock is not decorative, it directly affects whether visitors stay or leave.
Then SEO. IONOS reports that professionally validated pages can achieve search rankings up to 6% higher than those without SSL. That is not a guarantee, but it reflects a real signal: Google has used HTTPS as a ranking factor since 2014.
Beyond rankings, browsers like Chrome actively flag HTTP sites as "Not Secure." That warning appears before a visitor even sees your content. For any site that wants to look credible, SSL is no longer optional.
The good news: getting a certificate costs nothing. Let's Encrypt made free, automated SSL the standard, and most hosting providers now bundle it by default.
Free vs. Paid SSL Certificates: Which One Do You Actually Need?
Most websites need a Domain Validation (DV) certificate, and Let's Encrypt gives you exactly that, at no cost. According to soltia.net's 2026 report, more than 50% of the web currently uses Let's Encrypt certificates. That number alone tells you it is a trusted, production-ready solution.
So when would you pay for one? The answer comes down to what the certificate proves.
| Certificate type | Validation level | Cost | Browser padlock | Shows org name | Best for |
|---|---|---|---|---|---|
| Let's Encrypt | Domain Validation (DV) | Free | Yes | No | Blogs, small sites, personal projects |
| Paid OV | Organization Validation | Paid | Yes | Yes | Business sites that handle user data |
| Paid EV | Extended Validation | Paid (higher) | Yes | Yes | Banks, e-commerce, high-trust transactions |
A DV certificate confirms that you control the domain. That is enough for the padlock, enough for Google, and enough for the vast majority of websites.
An OV (Organization Validation) certificate goes further, it verifies that a real, registered business is behind the domain. An EV (Extended Validation) certificate is the strictest level, historically associated with the green address bar in older browsers, and still used by banks and large e-commerce platforms where maximum visible trust matters.
For a blog, portfolio, SaaS landing page, or small business site, Let's Encrypt is the right choice. It provides the same encryption strength as any paid certificate. The only thing it does not offer is organizational identity verification, and most visitors never check that anyway.
One practical note: Let's Encrypt does not issue OV or EV certificates. If your compliance requirements or industry standards demand OV or EV, you will need a paid certificate authority. For everyone else, free is fine.
For a deeper look at certificate types and how to choose, the guide on SSL certificates: what they are, available types, and how to install them on your site covers the full picture.
How to Install a Free SSL Certificate with Let’s Encrypt and Certbot
Certbot is the official command-line tool for obtaining and managing Let's Encrypt certificates. It requires SSH access and sudo privileges on your server. The steps below work on Ubuntu and Debian with either Nginx or Apache.
Before you start: make sure your domain's DNS A record points to your server's IP address. Certbot verifies domain ownership by making an HTTP request to your domain, so DNS must resolve correctly first.
Here is the full installation process:
Update your package repositories. This ensures you install the latest version of Certbot and avoid dependency conflicts.
For Ubuntu/Debian:
sudo apt update && sudo apt upgrade -yInstall Certbot and the plugin for your web server. Choose the command that matches your setup.
For Nginx:
sudo apt install certbot python3-certbot-nginx -yFor Apache:
sudo apt install certbot python3-certbot-apache -yRun Certbot to obtain your certificate and update the server configuration automatically. Replace
yourdomain.comwith your actual domain.For Nginx:
sudo certbot --nginx -d yourdomain.com -d www.yourdomain.comFor Apache:
sudo certbot --apache -d yourdomain.com -d www.yourdomain.comCertbot will ask for your email address (for renewal notices) and prompt you to agree to the terms of service.
Select automatic HTTP-to-HTTPS redirection when prompted. Certbot asks whether to redirect all HTTP traffic to HTTPS. Choose yes. This updates your server configuration so visitors who type the plain HTTP address are automatically sent to the secure version.
Verify the installation. Open your browser and navigate to your domain using HTTPS. You should see the padlock icon. Also confirm that visiting the HTTP version redirects you to HTTPS automatically.
That is the core install done. Certbot also writes the certificate files to /etc/letsencrypt/live/yourdomain.com/ and updates your server config block, you do not need to edit those files manually.
Nginx or Apache: does it matter? The commands differ, but the outcome is the same. Certbot handles the configuration update for both. If you are unsure which web server your VPS is running, the command nginx -v or apache2-v will tell you.
What about Windows or IIS? It is possible to use Let's Encrypt on Windows with IIS, but it requires a different toolchain, the Certbot client does not natively support IIS. That setup is outside the scope of this guide.
How to Set Up Automatic SSL Renewal and Test It
Good news: Certbot handles renewal automatically. When you install it, it registers a systemd timer (or cron job, depending on your system) that checks your certificates twice a day and renews any that are within 30 days of expiring, keeping them well inside the 90-day validity window. That means your certificate renews roughly every 60 days without you doing anything.
But "automatic" is only as reliable as your last test. Here is how to confirm everything is working before you need it.
Run a dry-run renewal test. This simulates the full renewal process without actually replacing your certificate. If it completes without errors, your setup is solid.
sudo certbot renew --dry-runYou should see output ending with
Congratulations, all simulated renewals succeeded.Check the renewal timer is active. On systems using systemd, verify the timer is enabled and scheduled.
sudo systemctl status certbot.timerThe output should show
active (waiting).Confirm the renewal hook reloads your web server. Certbot installs a deploy hook that reloads Nginx or Apache after a successful renewal. Check that the hook exists:
ls /etc/letsencrypt/renewal-hooks/deploy/If the directory is empty and you are running Nginx, create a simple reload hook:
echo '#!/bin/sh\nnginx -s reload' | sudo tee /etc/letsencrypt/renewal-hooks/deploy/reload-nginx.sh
sudo chmod +x /etc/letsencrypt/renewal-hooks/deploy/reload-nginx.sh
Check your certificate's expiry date any time with:
sudo certbot certificatesThis lists every managed certificate, its domain, and its expiry date.
Run the dry-run test after any infrastructure change to catch problems early.
For a step-by-step walkthrough specific to cPanel environments, see the guide on managing Let's Encrypt certificates in cPanel.
SSL Certificado Gratis: Cloudflare and Control Panel One-Click Options
No SSH access? No problem. Two other paths get you HTTPS without touching a terminal.
Cloudflare SSL works by placing Cloudflare's network between your visitors and your server. When a visitor connects, Cloudflare handles the HTTPS handshake using its own certificate. Setup takes under five minutes: point your domain's nameservers to Cloudflare, and SSL activates automatically on the free plan.
One important caveat: Cloudflare's default mode encrypts traffic between the visitor and Cloudflare, but the connection between Cloudflare and your origin server may still be unencrypted. To close that gap, set the SSL/TLS mode to Full (Strict) in the Cloudflare dashboard. This requires a valid certificate on your origin server too, but it ensures end-to-end encryption. Do not treat the default "Flexible" mode as equivalent to a direct certificate install.
Also worth knowing: Cloudflare's proxy mode can interfere with Let's Encrypt's HTTP-01 domain validation challenge, per the tool's documentation. If you plan to run Certbot alongside Cloudflare, temporarily disable the proxy (set DNS records to "DNS only") during certificate issuance.
Control panel one-click installers are the easiest path for shared hosting users. Both cPanel and Plesk include built-in Let's Encrypt integration. In cPanel, you will find it under the SSL/TLS section. In Plesk, it appears as a Let's Encrypt extension in the domain settings. A few clicks, and the certificate is issued and installed, with auto-renewal configured automatically.
No commands, no SSH, no configuration files. For most shared hosting customers, this is the right approach.
If you are on a cPanel-based plan and want a detailed walkthrough, the guide on activating and renewing a free SSL certificate in cPanel covers every step.
How to Verify Your SSL Installation and Harden Your HTTPS Configuration
Installing the certificate is step one. Confirming it works correctly, and then tightening the configuration, is what separates a basic setup from a solid one.
Verify the certificate in your browser. Load your site over HTTPS and click the padlock icon. Your browser will show the certificate's issuer (Let's Encrypt), the domain it covers, and its expiry date. If you see a warning instead of a padlock, the certificate may not cover your exact domain, or mixed content (HTTP resources loaded on an HTTPS page) may be triggering the warning.
Use an online SSL checker. Tools like SSL Labs' Server Test grade your full HTTPS configuration, not just the certificate itself. They flag weak cipher suites, missing headers, and chain issues that a browser padlock alone will not reveal.
Check these items before calling it done:
- The padlock appears on both
yourdomain.comandwww.yourdomain.com - Visiting the HTTP version redirects to HTTPS (status 301, not 302)
- No mixed content warnings appear in the browser console
- The certificate issuer shows as Let's Encrypt
- The certificate issuer shows as Let's Encrypt and the expiry date is set correctly
Add HSTS for stronger protection. HTTP Strict Transport Security (HSTS) tells browsers to always use HTTPS for your domain, even if a user types the HTTP address. Add this header to your Nginx or Apache configuration:
Strict-Transport-Security: max-age=31536000; includeSubDomains
The max-age value sets how long browsers remember the rule, in seconds (one year equals 31536000 seconds). Start with a shorter value while testing, then increase it once you are confident your HTTPS setup is stable. Once HSTS is active and cached by browsers, switching back to HTTP becomes very difficult, so only enable it when your certificate and redirects are confirmed working.
Does Your Hosting Provider Already Include a Free SSL Certificate?
Many managed hosting platforms bundle Let's Encrypt SSL at no extra cost, so you may not need to run a single command. Napoleon is a Brazilian web infrastructure provider offering shared hosting, VPS, and bare metal servers with support for cPanel, DirectAdmin, and Plesk. If your plan already includes one-click SSL, the steps in this guide become optional. Check your control panel first before reaching for the terminal.
Prices and plan limits verified as of October 2026.
FAQs
Does Let’s Encrypt work on Windows or IIS servers?
Yes, but it requires a different toolchain. Certbot does not natively support IIS, so you would need a Windows-compatible client such as win-acme. The process is more involved than the Linux workflow described in this guide. If you are running Windows Server with IIS, search specifically for IIS-compatible Let's Encrypt clients, as the commands and configuration steps differ significantly from what is shown here.
What happens to my site if my SSL certificate expires?
Browsers immediately display a full-page security warning, blocking visitors before they even see your content. Most visitors will leave rather than click through the warning. Search engines may also flag the site. With Certbot's automatic renewal and a working systemd timer, expiry should not happen, but running sudo certbot renew --dry-run after any server change is a good habit that catches problems before they become emergencies.
Is a free SSL certificate as secure as a paid one?
For encryption strength, yes. Let's Encrypt issues Domain Validation certificates that use the same cryptographic standards as paid certificates. The difference is not in the encryption itself but in what the certificate proves. A paid OV or EV certificate verifies the organization behind the domain. A free DV certificate only confirms domain control. For banks or large e-commerce platforms, the organizational verification of a paid certificate may be required.
Can I use Let’s Encrypt for a wildcard certificate that covers all subdomains?
Yes. Let's Encrypt supports wildcard certificates using the DNS-01 challenge instead of the standard HTTP-01 challenge. The Certbot command uses the -d "*.yourdomain.com" flag, and you must be able to create a DNS TXT record during the issuance process. This is more complex than a standard certificate install and requires either manual DNS updates or an automated DNS plugin for your registrar or DNS provider.
How many domains can I secure with a single Let’s Encrypt certificate?
Let's Encrypt allows up to 100 domain names (called Subject Alternative Names, or SANs) on a single certificate. You add them with multiple -d flags in the Certbot command. All domains must point to the same server, since Certbot needs to validate each one. For most sites, a single certificate covering yourdomain.com and www.yourdomain.com is all you need.
Conclusion
A free SSL certificate from Let's Encrypt gives you the same encryption strength as a paid one, meets Google's HTTPS requirement, and removes the browser security warning that drives visitors away. For most websites, a DV certificate is all you need, and Certbot makes the whole process repeatable and automatic.
If you have SSH access, start with the Certbot steps in this guide and run the dry-run renewal test before you move on. If you are on shared hosting, check your control panel first. You may find that SSL is already one click away, with no terminal required.